Sunday, April 9, 2017

Sunday, April 9, 2017

Yesterday I energized the irrigation system and tested all 13 zones. Everything seemed OK. There are a few spray heads that are partially plugged. There are also several spray heads that I need to change the orientation, field of coverage and/or the height of the nozzle. These were apparent to us last Spring and I brought it to John's (Landscaper) attention. At the time, it was obvious that John really did not want to be troubled with it. It really was Wally's (irrigation guy) area and John said he was having problems getting Wally's attention. I knew I could address the issues myself later so I let it slide. Well, it is now "later". I will do some research on these Rainbird spray heads. It won't be too complicated and the parts are readily available almost anywhere.

We have received a lot of rain over the past week or so. The only areas that look like they need water are the raised beds (Zone 13). Today I set the irrigation system to only run Zone 13 for one hour starting at 0530 hours every day. The Zone 13 uses drip hoses. While I see absolutely no signs of the 15 pepper plants I set out two weeks ago or any of the chard or kale, I am still hopeful they will come up.

Today is a another beautiful Spring day, albeit a bit gusty (the chess pieces are falling right and left). I took T's ‘Trailing Red’ livingstone daisy out to be planted in the same spot as last year. This is beautiful green and white waxy-leafed plant with tiny red flowers. It seemed to like the location T selected for it last year and spread greatly. I knew it was not going to survive the winter so last fall I took two cuttings and brought them inside. One I put in a bottle water and the other I planted in a pot. Both did very well over the winter. The one in the water rooted and I sent it to Houston with Laura for their garden. The one I potted is now back in its original home.


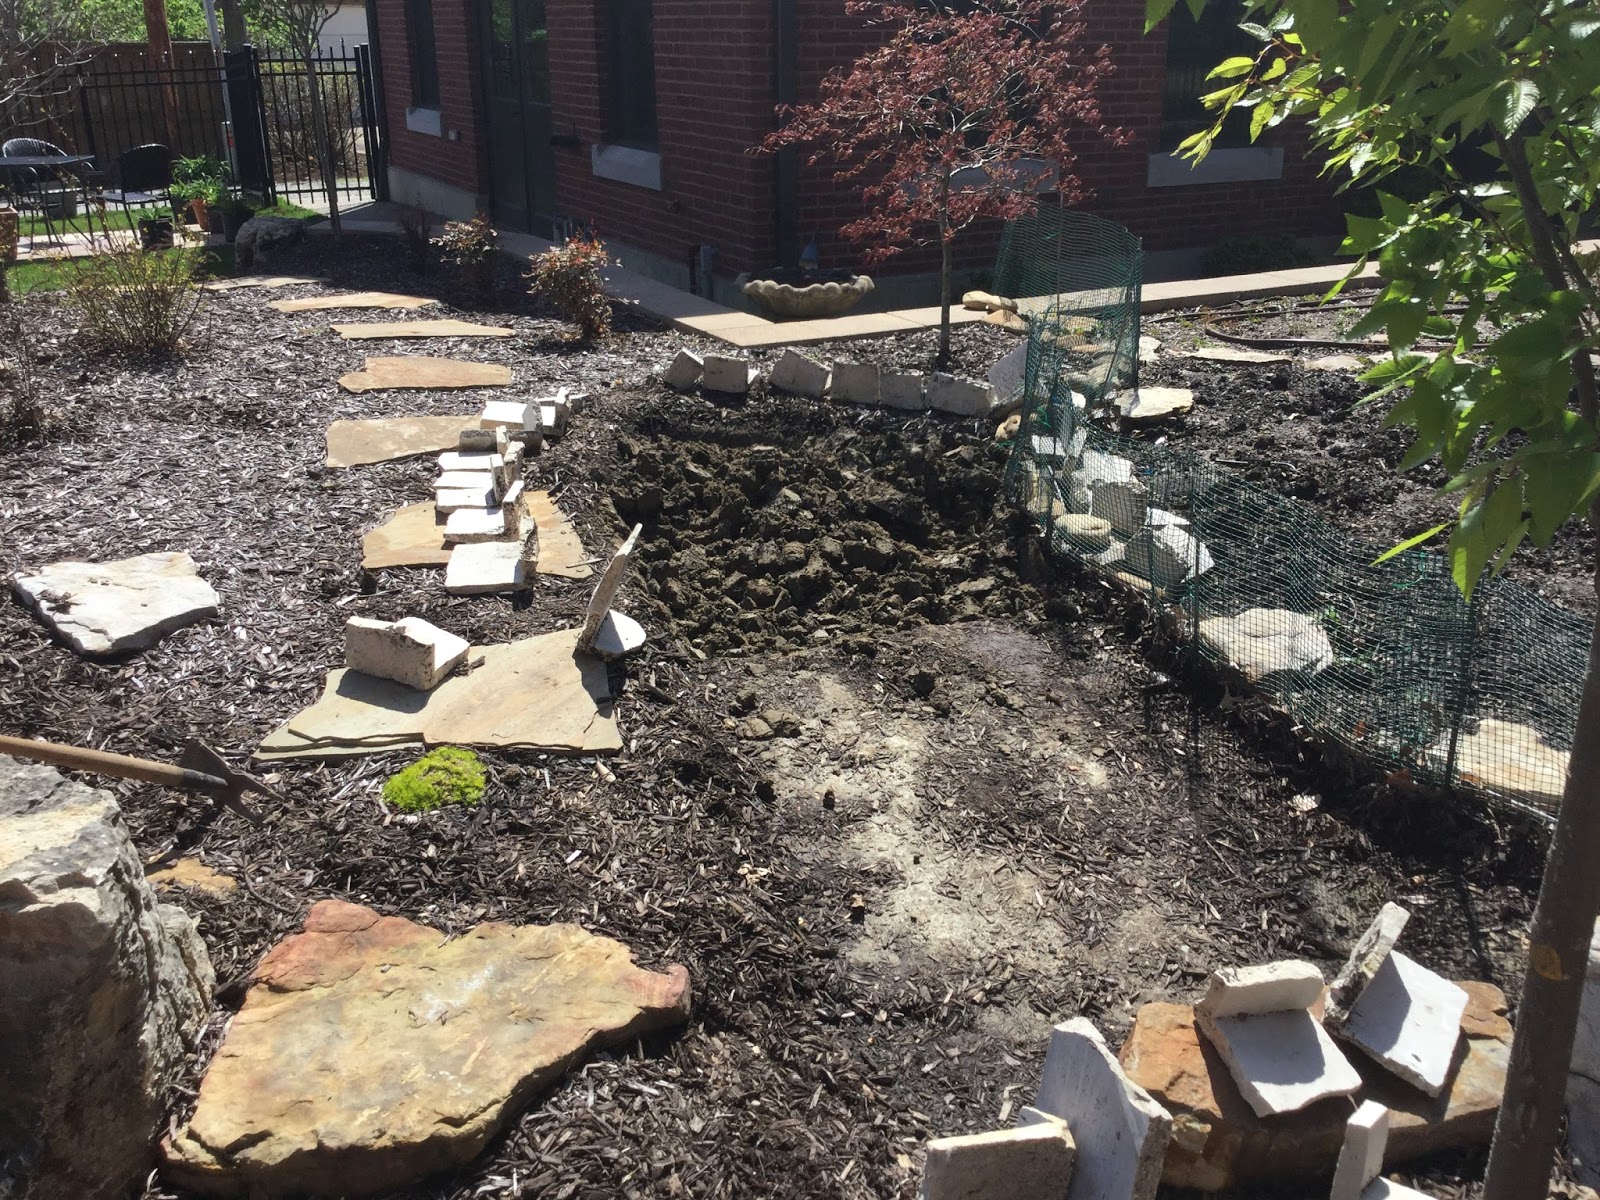
I also performed some surgery around the Canadian Red Cherry. We noticed last year that there were sprouts coming out of the root ball of this tree. I cut them back a couple of time last year and it appears I will need to do so again this year.

Before culling the root ball sprouts
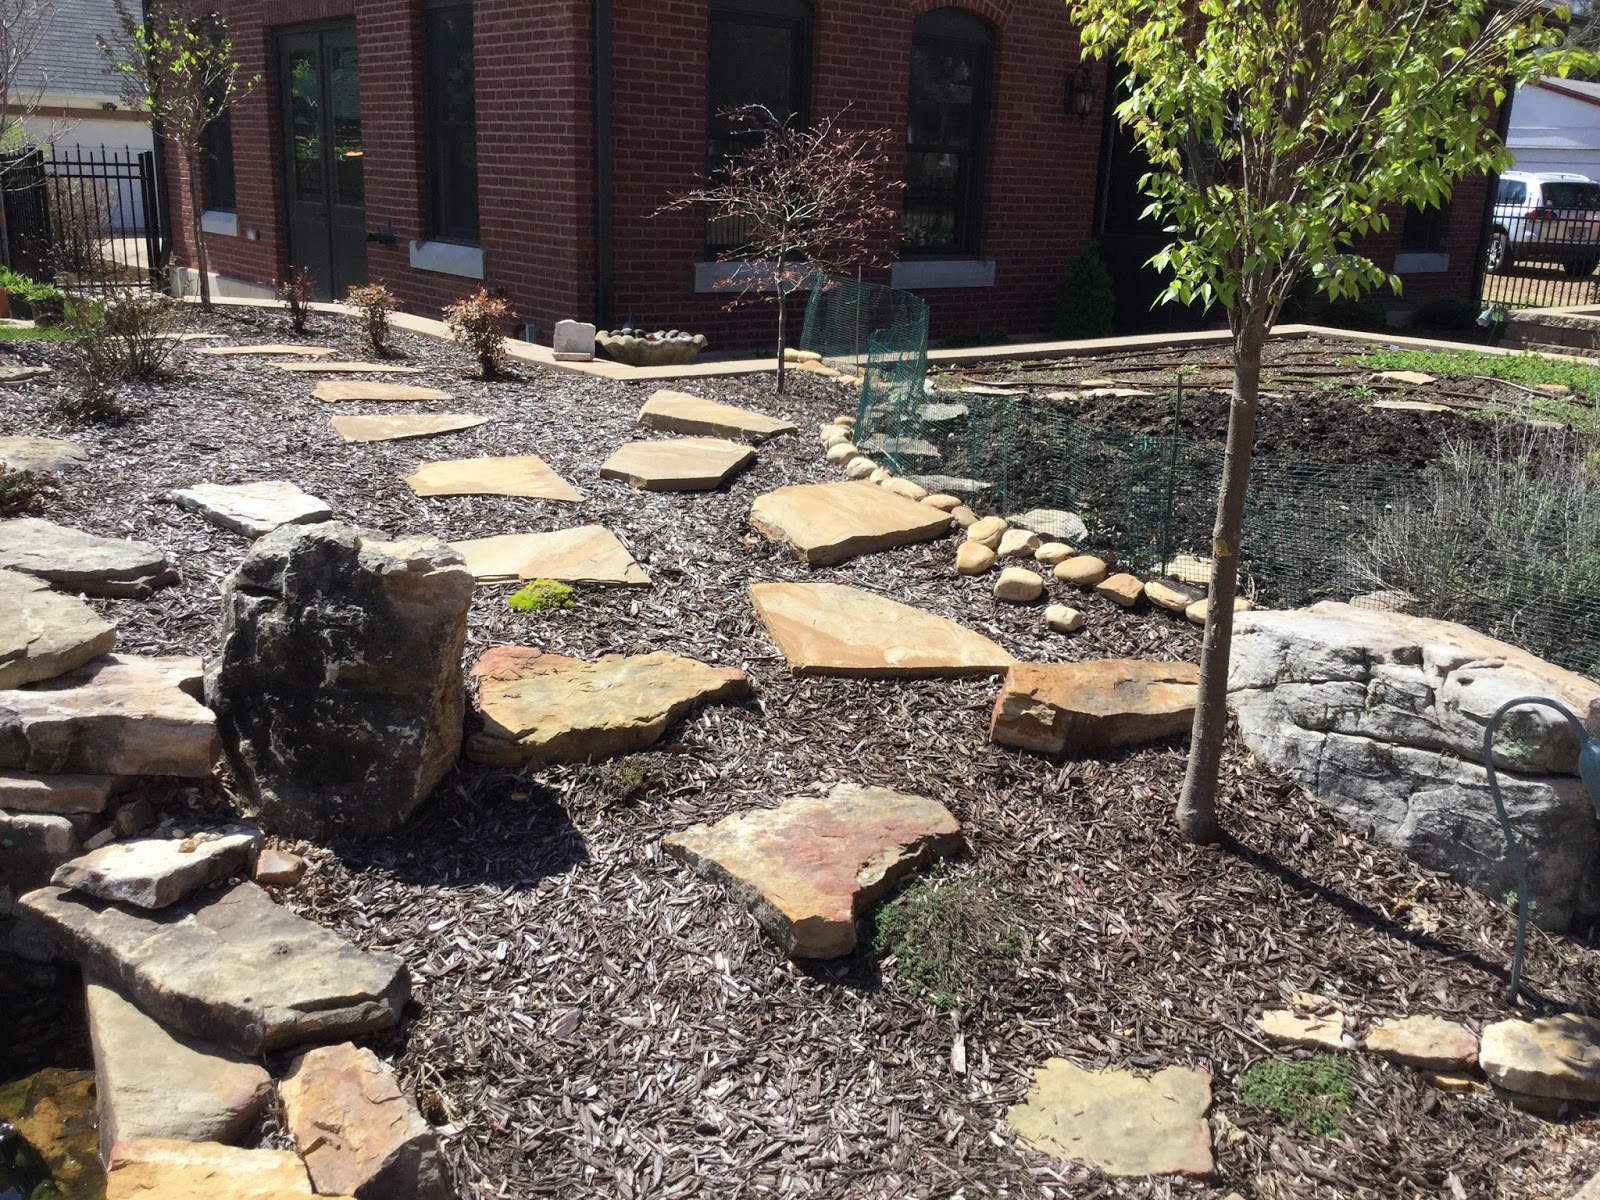
After culling
I also pruned of the dead branches of the ‘Silvery Blue’ Russian Sage up by the Arborvitae. This sage is just now starting to show some tiny leaves. It seems to leaf out and blossom later than the ‘Denim n Lace’ Russian Sage down by the Zelkova. 


The remainder of the morning I spent weeding spearmint from the east raised bed. This stuff is very invasive and I will never plant it again unless in a container.

This afternoon, I notice the copious number of blue flowers on the lungwort along the east side of the chess board. They seem to like that sorry soil!

Friday, April 7, 2017

Friday, April 7, 2017: Succulents in Bed

Today I went out to get more pea gravel and to look at succulents I might want to start in my new garden. I went to a different store (Home Depot instead of Lowe's). They did not have pea gravel but they did have pea pebbles. Probably the same, right? Nope, the pea pebbles are a little courser than the pea gravel. I really liked the particle size of the gravel I put in yesterday, but I mixed it a bit and it will be fine. In the future, I want to stick to the pea gravel as my top layer. I added one additional cubic foot of the pea pebbles to the garden. So to recap, I have two cubic feet of River Rock and three cubic feet of smaller (two pea gravel and one pea pebbles). This final cubic foot allowed me to mound a little.

The succulents at Home Depot were not extremely inspiring, but I did get four. I don't think they are hardy in this area, so I will need to bring them in next fall if I want to keep them at all. As an inexpensive starter, they will be fine.


The Desert Gems cacti are small indoor plants perfect for decorating desks and tabletops. They do recommend growing them in a "bright" spot and say that over watering is the easiest way to "do them in". They suggest watering every 10-14 days.


The Kosmik Kaktus is a Haworthia species from South Africa. It is not hardy here either and I see they recommend not putting it in direct sunlight. Oh well, we'll see what happens.


The Golden Sedum (Sedum aldolphii) is hardy in USDA Zones 8-11. It is a spreader and supposedly will have star shaped flowers.


The Snow Pole Cactus is native to mountainous Peru at elevations of 4000 to 7000 feet. In time, will form a branched, tree-like columnar to 6' in height. Not sure how fast it grows. It says it has a minimum temperature of 32 F. Must not get very cold in mountainous Peru. I decided to put it at the center of the bed.

As I was leaving the Depot, I remembered that the Mobot also has a collection of cacti and succulents at their gift shop. Being just down the street, I decided to stop by and have a look. I ended up getting two plants. I was very disappointed they were not labeled any better than they were.


A cactus. No other information.


A sedum. No other information. Several of the pedals fell off while I was planting. I may see if they will propagate.


Thursday, April 6, 2017

Thursday, April 6, 2017: Blue Sky and Succulent Bed

In contrast to the last couple of days, today is beautiful. Temperature in the upper 50's and a clear blue sky. I took the opportunity to work on the succulent bed.

I decided to start with a smaller bed than the one I originally envisioned. I had cleared the mulch off a three foot wide strip about 12 feet long. To begin with, I decided to try a five foot strip. If it goes well, I can add more later.

The soil in this area is mostly clay. Not conducive to succulents. Therefore I started by digging out four to five inches of this clay. Most of it I either gave to my neighbor (Morgan) or deposited around the azaleas in the front yard. That wet clay is HEAVY!!


Using the stone work left over from the sunroom chimney breast, I started outlining the bed.


Next I mixed equal parts of the excavated clay with the two cubic feet of top soil I bought earlier. The mixture was enough to put a two to three inches in the bed.


Next I added the two cubic feet of river rock.


 Finally, two cubic feet of pea gravel.


I would like to observe how this area drains during a hard rain. Drainage is critical for the success of this bed. The weather forecast is showing the next rain to be early next week. In the mean time, I will start locating the succulents I will be putting into the bed. I may get another cubic foot of the pea gravel.

Wednesday, April 5, 2017

Wednesday, April 5, 2017: Ants, Rain and Roses

A couple of weeks ago I noticed very small ants on the deck around the hot tub. I called our pest control people (the ones I am paying $50/month to keep the insects out). They came out and sprayed. Yesterday, in anticipation for the visit of my sister-in-law, I pulled back the hot tub cover only to find a swarm of ants were occupying the hot tub rim of the hot tub...en mass.


The pest control guy showed up about an hour later and sprayed for effect.

Today, it rained off and on all day. I went out and bought three more roses for T's rose garden. Two were Knock Out's and one was another source.

 I got them planted between showers.


I may put one more rose in if I can find the "correct" color.

I also bought two cubic feet of river rock, two cubic feet of pea gravel and 1.5 cubic feet of top soil. This is what I intend to use to establish the succulent garden. Maybe tomorrow when it is supposed to be drier.

Saturday, April 1, 2017

Saturday, April 1, 2017 (no fooling!)

It is a beautiful Spring day with the high around 60F and a completely clear sky. The bright sun makes it seem much warmer.

Today I installed the back flow preventer on the irrigation system and charged the system up to that point. I am confident we have had our last freeze for the season.

On several occasions, we have discussed the potential of installing a succulent garden. The "pincushion" garden at the Mobot was our inspiration. From the Mobot web site:

The Pincushion Garden, one of the largest of its kind in the world, resurrects a "lost art" of garden design once common in traditional Victorian displays. During the early 1900’s the Garden only had 2 circular beds on either side of the entrance to Spink Pavillion.  Each year they had a different display within the beds.  Some years it was a mix of the Garden’s cacti collection bedded out at random and other years it was an intricate carpet bedding design of succulents.  Today’s designs mimic the intricate patterns from those 2 beds.

20 circular beds host approximately 25,000 succulent plants arranged in geometric designs. Innovative drainage and irrigation techniques have been incorporated into the design of the new garden, and horticulturists work with plant cuttings to replant each year rather than purchase new succulents.This meticulous and intricate design work takes nearly two weeks to install by a team of ten horticulturists and volunteers.


While not as ambitious as the Mobot, I have been thinking about how to do something in our new backyard. I have always enjoyed succulents and there are many that are hardy in our zone. Outside of the raised bed, our soil is mostly clay, which is not good for cacti or succulents, which like fast draining soil. I will have to provide the appropriate soil mixture. I concluded the best spot would be between the pond and the east raised bed.


I've spent a considerable amount of time trying to decide what border I should use. The least appealing is the nasty black plastic stuff you see everywhere. The most appealing has been the 3" diameter wooden posts.  I figured I might need a much as 30 feet of bordering. Going with the wood would cost several hundred dollars.

Today it struck me that I already have the bordering material. In fact, I have been trying to find someone to haul it away for the past year. It is the white stone that we used on the interior chimney breast. Why we ended up with so much excess, and much of it is corners, I will never understand. The corners will make a nice border around the bed.

First I cleared the mulch and redistributed to areas that needed more.


I will dig down 3" to 4" into the clay and then build up my succulent conducive soil. But, for today, I was content to place the stone border around the area to see if I had enough (plenty left over) and to see how it looked.


Right now they look like little grave stones. When I am finished, they will protrude a couple of inches above the surrounding ground.

Thursday, March 30, 2017

Thursday, March 30, 2017

A stormy day, off and on, today. I trimmed the two "new" junipers on the east fence. These were replaced last fall by John (landscaper) since they appeared to be dying. At the time, Morgan (east neighbor) bought the two junipers that were removed at a greatly reduced price. I asked him today how they were doing and he said "great". The two replacement junipers show a lot of dead branches compared to the other three junipers. Not concerned yet.


I churned the square composter and added some compost starter pellets. I rolled the old barrel composter out of the garage and put it along side the square on. I also ordered a replacement door for the barrel composter. Several years ago I put some rancid macadamia nuts in the barrel composter and the neighborhood squirrels gnawed a hole through the door to get to the nuts. I decided it was time to move beyond using duct tape and get a new door.


At Christmas last year, our new neighbors on the west (Liz and Ryan) presented us with a beautiful poinsettia plant. It still looked healthy today so I looked on-line for the proper time and method to keep it alive. I found the plant could potentially grow to 16' tall and it was recommended to prune in March-April. The pruning technique recommended was to cut back the plant by 50%. I did it and we'll see how it does. It is not hardy in our Hardiness Zone, so I will need to keep it inside during the winter if it survives my pruning.

Before Pruning

After Pruning
I am also putting plans together to install a succulent bed between the pond and the east raised bed. More on that later.

I also added the beneficial bacteria to the pond today.

Wednesday, March 29, 2017

Wednesday, March 29, 2017

We are past the first week of Spring without a freeze or even snow. Last week before I took a trip to Philadelphia, I turned on the south side exterior water bib, reinstalled the Watkins valve in the pond skimmer and ran the hose over to it to maintain the water level while I was gone. We have been having a lot of wind which tends to drive water out of the pond. Everything seems to be working well.

Yesterday, I went to our favorite nursery in hopes of finding some rose bushes and okra plants. Seems it is still a bit early. They said the okra plants would arrive in about two weeks (mid-April). I was also interested in getting some Hellebore. This is a small plant which blooms early in Spring and is shade loving. I want to try it between the Hornbeams along the east fence line.

This morning I rose early and went for my weekly walk through the MoBot. Things are starting to sprout. The Hellebore has been blooming for several weeks. The hosta is coming up and the tulips are everywhere along with the daffodils. I also noticed the red twig dogwoods have been cut back almost to the ground. We have these along the north fence on the east side of the house. They were getting overgrown last year, so when I got home I looked up when these should be pruned. I found the best time is late winter or early spring while they are still dormant. It was recommended that the stems be cut back about one-third. For those stems running along the ground, they should be cut back to the base. Ours dogwoods are beyond dormant and starting to leaf out. I went ahead however and cut them back as directed.
Red Twig Dogwood after pruning

Red Twig Dogwood after pruning

Looking around the backyard, the viburnum along the west fence are starting to bloom and are very fragrant.

viburnum

The hollyhocks started coming up weeks ago. Last year we had one by the south door of the sunroom. I raised a dozen more inside and planted them in the fall. The rabbits have chewed on the ones along the west fence, but otherwise, they are coming up nicely. We did not get any flowers on the hollyhock last year or on the foxgloves either. Hopefully this year they will flower.

Hollyhock
The Serviceberry is starting to bloom and the Zelkova and Canadian Cherry are leafing out.
Serviceberry

Zelkova

Canadian Cherry
Add caption

Sunday, March 19, 2017

March 18, 2017 - Spring Planting

Last week was hopefully Winter's last gasp. The grandkids came up for Spring break, but there was very little Spring to enjoy. It snowed off and on all week long. I put the chess pieces out and we did get a couple of games in...Gavin beat me again. The grandkids left for Houston on Friday. Of course, once they departed, the weather started to improve.

Yesterday, while still cool, it was warm enough for me to begin putting out the vegetables I had started indoors. I transplanted eight Peppadew and seven assorted pepper plants. The seeds for all the peppers were from our previous plants. In planting these in potting plugs inside, with few exceptions, all the seeds sprouted and I thinned each plug to one plant before transplanting outside. I also transplanted six blue dwarf curled kale plants. I planted seeds of two different varieties of Swiss Chard, "Five Color Silverbeet" and "Ruby". I had potted some Yolo Wonder Sweet Peppers inside, but none sprouted. I am also started soaking some heritage beets for planting today. At this time, the only other plants I certainly want to plant this Spring are some more okra (we really enjoyed the ones we had last year) and some magnolias (bunny prevention) around the kale and chard. No tomatoes this year. Don't want to deal with the squirrels! While playing the few chess games this week, we found some small black beans on the chess board. Don't know what they are, but I planted them in the potting plugs that contained the unsprouted sweet peppers. We'll see if anything develops.

Last summer, T decided she wanted more garden area than originally planned. I moved the demarcation line on the east raised bed to increase the garden size of this bed more than 50%. Now, I estimate that the east raised bed has about 250 sq ft and the west bed about 100 sq ft. Unfortunately, I found the expanded east bed was very dense clay. Last year I rented a tiller and tilled in ten bags of Scots Humus and Manure soil into the new section. We did not plant anything last year in this new section and I currently don't have any plans to plant anything in it this year. Yesterday I tilled another the ten 0.75 cubic foot bags of the same Scots soil into the new section. The soil should be getting better and better.


Sunday, February 26, 2017

Snap Shot and Barley Straw - January 25, 2017

The weather this past week was very Spring-like with temperatures in the low 70's. I spent a good amount of time cleaning up the garden. On Friday, I spread Snap Shot on the mulched areas. Today, I put a 4 oz barley straw bale in the pond. The barley bale supposedly is an old apprach to controlling algae and keeping the pond clear. According to a Penn State paper:

Barley straw does not kill existing algae, but it inhibits the new growth of algae. The exact mechanism is poorly understood, but it seems that barley straw, when exposed to sunlight and in the presence of oxygen, produces a chemical that inhibits algae growth.

Barley straw does not reduce the growth of other aquatic plants. In fact, in some cases aquatic plant growth has increased after barley straw applications because algae are no longer present to compete with the aquatic plants.

With regards to where to position the bale, the Penn State paper recommends:

It is best to anchor the straw packages to the bottom, but provide a float to keep the straw near the surface of the pond where sunlight and oxygen are more prevalent.

This and other articles warn to replace the bales every six months. Otherwise, as the barley continues to decompose, they will eventually become a nutrient source for algae and potentially deoxygenate the water and endanger the fish population. I have put on my calendar to replace the bale In September.

I thought of placing the bale in the upper pond where it would get good flow across it and lots of sunlight. This is shallow water without the danger of the bale sinking. The other, less obvious location, would be at the intake to the skimmer in the lower pond. This is deep water so it has more of a potential to sink. The latter position is where it is starting out.


Monday, November 28, 2016

Monday, November 28 Winterization Checkup

This past Saturday, I winterized the water lines to the garage. The previous Saturday, I blew out all the irrigation lines. Today, Wally (irrigation) called and said he was in the area and wanted to stop by and check out the irrigation system. I told him I had already blew the lines out but he was certainly welcome to stop by and check it out. He arrived and said everything looked good. Whereas I purchased the plastic insert for the back flow preventer, which has a tap to connect to a compressed air source, Wally said he normally just hooked up to one of the cocks on the body of the preventer itself. He normally leaves the iron back flow preventer in place through the winter. He did suggest leaving water inlet and outlet ball valves one-half open and partially opening the cock on the inlet side of the preventer. I told him I used my high pressure low volume compressor instead of the low pressure high volume source recommended by Rain Bird. He said that was fine as long as I had air blowing out each of the heads, which I did.